Monday, July 21, 2014

Cheesy Chicken & Rice stuffed Poblano Peppers – Healthy: Yum-E!

Stuffed peppers are nostalgic. They have been around forever and can be made in so many different ways with so many different fillings and so many different peppers. I had some extra ingredients lying around and experimented with this one. Well, experiment: Success!

Without further ado…


Cheesy Chicken & Rice stuffed Poblano Peppers – Healthy: Yum-E!


2 cups yellow rice, cooked al dente* (you can use any rice, this is what I had on hand)
1 cup shredded, previously roasted chicken (you can use store bought, or you can make the Cheapest, juiciest, tastiest Roasted Chicken ever)
1/3 cup diced red/orange/yellow pepper (you can also use green; I like to add color, but any can work!)
1/3 cup diced red onion (again, color factor, but a Vidalia onion would also work)
1/3 cup diced baby bella mushrooms (optional, if you don’t like mushrooms, omit and add additional veggie or more onion/pepper)
1 t. dried cilantro
½ t. garlic powder
½ t. cumin
¼ - ½ t. salt (I am not much of a salt person, and you have to consider that the yellow rice plus soup had some salt in it… adjust to taste)
¼ t. freshly ground black pepper
1 dash (or 5) crushed red pepper (optional – I love spice!)
½ can low fat cream of chicken soup
1 egg, beaten
2 laughing cow cheese wedges, room temperature (I used the queso fresco & chipotle version and left sitting out on counter for 15-20 minutes before use)
4 medium poblano peppers, deseeded, with a slit cut down one side for stuffing
cooking spray

*Did you know… al dente translates in Italian to “to the tooth”, which means it has bite and is not cooked fully until soft.

Preheat oven to 375. Spray bottom of glass cooking dish with cooking spray.
Prepare poblano peppers - cut a slit down one side of pepper and deseed.

In large mixing bowl, mix rice, chicken, veggies and all seasonings. In separate bowl, blend egg, cheese wedge and cream of chicken soup completely together; add to rice, chicken and veggie mixture. Stuff each pepper evenly. Place slit side up in glass baking dish and bake for 30-35 minutes. Let sit for 5 minutes before cutting into your peppers.
Serves 4 - I would recommend a tomato and cucumber salad (and any other veg you like) to accompany this dish - the coolness of the tomatoes and cucumbers will go well with the spice of the peppers.

Soooo delish — check out it out... a peak inside the pepper, this one shown cut in half.


Follow us, pretty please!
 IG: @HealthyYumE
Facebook: Healthy: Yum-E
Twitter: HealthyYumE
Google+: +Jessica Russo 
BlogLovin': Healthy: Yum-E!


Saturday, June 28, 2014

Chocolatey, rich & chewy (Low fat, low sugar) Brownies - Healthy: Yum-E!

Do you have a sweet tooth? Mine is dominant! Well... to be honest, I have both sweet and savory tooth, and both are equally dominant - LOL.

Last night I desperately (a little dramatic, I know) wanted a gooey, chewy brownie! I gave in & made some... but, I did good! I made a low fat, low sugar version semi-homemade style! So delish and not full of guilt! Secret ingredient: a little bit of freshly brewed coffee! Coffee really brings out the flavor of chocolate!

Chocolatey, rich & chewy (Low fat, low sugar) Brownies


1 box Pillsbury sugar-free Chocolate Brownie mix
1 T. chia seeds
1/2 t. cinnamon
dash salt
1 large egg
1 1/2 T. water
1 1/2 T. freshly brewed coffee (optional - can replace with an additional 1 1/2 T. of water)
1/3 cup lower sugar applesauce (I used Healthy Harvest granny smith — tip! The snack size ones are 1/3 cup!)

Preheat oven to 350. Spray mini muffin tin - will make 15. Whisk dry ingredients in large bowl, add liquid ingredients and mix until just together. Bake for about 15-20 minutes, or until toothpick comes out mostly clean. Don't over bake, under would be better than over! :) Cool and ENJOY!
Makes 15 Healthy: Yum-E rich & chewy mini brownies!


Follow us, pretty please!
 IG: @HealthyYumE
Facebook: Healthy: Yum-E
Twitter: HealthyYumE
Google+: +Jessica Russo 
BlogLovin': Healthy: Yum-E!

Nutritional Info per mini brownie:
Calories: 84
Fat: 2.6g
Carb: 19.5g
Fiber: 2.8g
Sugar: .7g
Sugar alcohol: 7.2g
Protein: 1.5g

Saturday, June 21, 2014

Fluffy Vanilla-Cinnamon Whole Wheat Protein Pancakes - Healthy: Yum-E!

PANCAKES! Who doesn't love pancakes? My waistline doesn't... but my tastebuds do!

There are tons of recipes floating around for protein pancakes. Most of them involve some fancy protein powder and a bunch of other ingredients most people don't have sitting around in their pantry. More so than that, the recipes never come out like the pictures they post with them... stacks of 10 high that are perfectly browned... are they really using their recipe to make those pancakes they post pictures of? Sometimes, I really am not convinced.

Want a pretty simple recipe that will result in healthy, FLUFFY, delicious & EASY protein enhanced pancakes? Look no further... what's the trick to fluffy pancakes? Fluffy egg whites!**

Are you cooking for yourself? If you are, get excited, and don't feel bad about it — that just means more pancakes for you!! Save the 2nd serving for the next day's breakfast — these pancakes heat up well in the microwave in about 45 seconds!


Fluffy Vanilla-Cinnamon Whole Wheat Protein Pancakes
Healthy: Yum-E!


1 1/2 scoops (1/2 cup) vanilla protein powder (I used Body by Vi, but use anything you have!)
3/4 cup whole wheat pancake mix (I used Simply Nature brand)
1 T. chia seeds
1/2 t. cinnamon
1/4 t. nutmeg
dash salt
2 egg whites**
1/2 cup unsweetened almond milk
2 T. applesauce
1/2 t. vanilla
Sugar free Cary's Maple syrup, optional
I can't believe it's not butter, 3 sprays each pancakes, optional
sliced bananas or fruit of your choice, optional


Blend all dry ingredients together in medium mixing bowl. **In separate bowl, whisk egg whites to almost soft peaks, about 2-3 minutes by hand; the fluffier the egg whites, the fluffier the pancakes! Gently mix applesauce, vanilla and milk into egg whites. Combine all wet ingredients into dry ingredients until just blended; do not over mix! Allow mix to rest for 2-3 minutes.
Cook pancakes in frying pan lightly sprayed with cooking spray, over medium heat, for about 2 minutes per side, or until golden brown. Serve immediately; garnish with sprinkle of cinnamon, light butter and syrup of your choice — I use Cary's sugar free syrup & I can't believe it's not butter spray.
Serves 2


Follow us, pretty please!
 IG: @HealthyYumE
Facebook: Healthy: Yum-E
Twitter: HealthyYumE
Google+: +Jessica Russo 
BlogLovin': Healthy: Yum-E!

Nutritional Information per serving (2 large pancakes) *approximately - not including syrup

Calories: 240
Fat: 4g
Carbs: 32g
     Fiber: 9g
     Sugar: 7g
Protein: 17g


Cary's sugar free syrup (1/4 cup)
cals 30, fat 0, carbs 17g, sugar 0, sugar alcohol 11g

Monday, June 16, 2014

Cheapest, juiciest, tastiest roasted chicken EVER! Healthy: Yum-E!

Are you the kind of person that thinks eating healthy costs a ton of money? Are you living on a budget? (pshhh, I know I am). Would you rather save for vacation or something fun than spend tons of money on fad foods, shake mixes & other "diet" items that claim to be miracle fixes and healthy? Yeah, me too...

Chicken breast and tenderloins are probably the leanest protein you can eat. However, they are not the cheapest protein ever. Chicken tenderloins can cost upwards of $6 per pound. If you are truly on a budget, that can be a stretch, especially when you see cheaper alternatives like chicken thighs that cost half that or less per pound.

Well — I have a solution for ya. Split, skin-on chicken breasts ON SALE.

I don't know what grocery store you prefer, but some are cheaper than others. My new obsession is Buy 1, Get 1's (BOGO's) at Winn-Dixie. Well, I found a bargain today! BOGO split chicken breasts, skin on. The true bargain is that they were less than $3.50 per pound — at BOGO, thats $1.75 per pound. Um, yeah... gotta get that.

When I got them home (2 packs totaled 5 pounds for less than $9!!), I removed the skin (because its definitely not healthy: yum-e), and I rubbed them with seasonings and lime juice, and roast Healthy: YUM-E! Ok, enough talk... here is the recipe:

2 packages split, skin-on chicken breasts
1 lime or lemon, your choice!
2 t. chili powder (optional)
1 t. garlic powder
1 t. dried cilantro (or any herb you like! Thyme, basil, oregano, rosemary…all would be great!)
1/2 t. onion powder
1/2 - 1 t. salt, to taste
1/2 -1 t. black pepper, to taste
dash - 1/2 t. crushed red pepper, to taste (optional)
cooking spray

Heat oven to 400 degrees Fahrenheit. Spray large glass casserole dish with cooking spray. Remove chicken from package, remove all skin and rinse. Pat dry with paper towel and place in cooking dish. Squeeze one lime evenly over all chicken breasts. Mix all seasonings together in small bowl to create a rub, and rub evenly on chicken breasts. Once coated, spray lightly with cooking spray and cover with foil. Bake for 25 minutes covered, then uncovered 10-15 minutes. If you have a cooking thermometer, the chicken breasts should reach 165 degrees internal temperature. [Want to learn more about safe minimum cooking temperatures? Visit here].

Be careful not to overcook, or they will get dry. I like to start by baking the chicken covered to lock in some moisture; uncovering them allows for the outside to slightly brown. Be mindful that once you take them out of the oven, they should rest for at least 5 minutes before cutting into them; this will prevent the juices running out which will thus prevent the chicken from becoming dry.

Roasted Split Chicken Breasts


You know what else is SO AMAZING from cooking chicken this way, on the bone? You get the chicken breast, AND you get the chicken tenderloin underneath! Let me tell you... with the bone underneath and the breast on top... that will be THEE MOST TENDER chicken tenderloin EVER!


Cheapest, juiciest, tastiest roasted chicken EVER...
Split, skin-on (& removed) chicken breast = Healthy: Yum-E!


Follow us, pretty please!
 IG: @HealthyYumE
Facebook: Healthy: Yum-E
Twitter: HealthyYumE
Google+: +Jessica Russo 
BlogLovin': Healthy: Yum-E!

Tuesday, June 10, 2014

Smokey Cilantro-Lime Turkey Ragu over Brown Rice Pilaf - Healthy: YUM-E!

This is an ABSOLUTE staple in my meal prep toolkit! Most importantly, it is freaking DELICIOUS. I mean, mouth-watering, unbelievably flavorful, satisfying and just plain divine. Of course I would say that right, its my recipe... Nope... This picture has gotten more love and recipe requests than any other yet! It looks good, and it IS good!

You will see with this recipe that both the rice and turkey ragu have some of the same ingredients; do yourself a huge favor - chop everything for the recipe before you start cooking, that way you can just grab and drop the ingredients. Another tip: check out your local produce store for the veggies for extra cost savings! My local market has a back table with items seriously discounted - mostly because they are close to being on their "last leg". But, what do I care if I am taking them home to cook with immediately? I'll cut away a small bad spot here and there if an entire package of peppers cost $3 like this one did...

That's two poblano's, 3 yellow bell, 3 orange bell, and a jalapeño pepper... for $2.49. Yes, please! Support your local produce stand!

I absolutely LOVE cooking with ground turkey; it so gracefully takes on the flavor of anything you season it with. It's also affordable, especially when you buy in bulk! I buy the largest pack of ground turkey they sell at the local supermarket. Do yourself a favor, don't choose the "extra lean" version; it's just way too dry.

TIP! As soon as you get home from the store & before you throw this big guy into the freezer as is, open your ground turkey and divide it into 3 quart size zip-lock bags. Now you have 3 portions, ready to pull out to thaw individually. Cost saver!


Ok - enough commentary - here is the recipe:


Smokey Cilantro-Lime Turkey Ragu over Brown Rice Pilaf


Brown Rice Pilaf 

1 T. olive oil
1/2 cup onion, diced
1/2 cup bell peppers, diced (I try to use a combo of red and yellow for extra color!)
1-2 t. jalapeños, minced, or to taste
1 1/2 cup brown rice
3 cups water
2 t. salt
1/2 t. black pepper
1 t. cumin
1 t. chili powder
1/2 t. paprika
1 t. dried cilantro *Fresh is always best if available; double the amounts if so.
1/4 t. crushed red pepper
1 lime, freshly squeezed

Sauté veggies at medium heat in a medium stock pan in olive oil until beginning stages of tender, about 5 minutes (they will cook more with the rice... be careful not to over cook at this stage). Add rice and "toast", approximately 2 minutes. Add water and lime juice, stir, bring to boil and stir once more. Cover, then cook (without touching that lid!) on low for 25-30 minutes, until rice is tender (if you notice the water continue to noticeably bubble on low heat, turn down just a little more.... it should barely bubble as the rice steams). Remove, lid, fluff with fork; ready to serve.


Smokey Cilantro-Lime Turkey Ragu

1 T. olive oil
1 cup onion, diced
1 cup bell peppers, diced (I try to use a combo of red and yellow for extra color!)
1/2 jalapeño, minced, or to taste
3 - 4 garlic cloves, minced —> How to Chop Fresh Garlic
1 lb lean ground turkey
1 - 2 t. salt, to taste*
1/2 - 1 t. black pepper, to taste*
1 t. cumin
2 t. chili powder
1/2 t. paprika
1 1/2 t. dried cilantro [Fresh is always best; double the amount if so]
1/4 - 1 t. crushed red pepper, to taste*
1 can fire roasted diced tomatoes [or regular if that's what you have on hand - no worries!]
1/2 - 1 cup water [this depends on how "saucy" you prefer your ragu]
juice of 1 lime, freshly squeezed
*hint, add less at first, then add more if needed after you taste! — make sure not to taste until the turkey is cooked thoroughly though — raw turkey... ain't no one got time for that :)

Saute veggies at medium heat in large sautĂ© pan with olive oil until beginning stage of tender, approximately 5 minutes. Add garlic, stir, and cook an additional minute (the reason you don't add the garlic initially is because it may burn). Add ground turkey and seasonings, and brown turkey, breaking it up gently as it cooks — hint! Move veggies to one side of the sautĂ© pan, then add raw ground turkey to the empty side. This will allow the turkey to actually brown because it is hitting the bottom of the pan. Let cook 2-3 minutes on one side, then begin to break it up and cook some more. Add tomatoes, and stir everything together, cooking for 1-2 minutes. Add water and lime juice, stir, and bring to medium-heavy simmer (if you find your tomatoes are popping and going crazy and making a mess, your heat is too high!). Turn heat down to low, and gently simmer for 15-20 minutes. Taste to make sure seasonings are OK to your taste; this is the time to add a dash more salt, or a dash more crushed red pepper. Remember! You can always ADD, but you can never take it away.


Putting it all together

If serving immediately, serve in bowl with 1/2 brown rice pilaf topped with 1/2-3/4 cup ground turkey ragu. I usually serve this with a side of roasted broccoli or roasted brussel sprouts to make it, not only more filling, but colorful and even more nutrient-rich! Check out my blog on the flavor and power of Roasted Veggies! I also serve with a slice of lime and sprinkle on some parmesan (about 1 t.) because, why not?

Are you about that tupperware life? Meal prep is AWESOME! It makes life that much easier, especially during the week. "Fail to plan, and you plan to fail"  with all leftovers, portion in tupperware and eat throughout the week. Just you? Freeze a few and pull out of the freezer to thaw in the fridge the night before you plan to indulge :)


Smokey Cilantro-Lime Turkey Ragu over Brown Rice Pilaf


So Healthy... So YUM-E!


Nutrition Facts, coming soon
Follow us, pretty please!
 IG: @HealthyYumE
Facebook: Healthy: Yum-E
Twitter: HealthyYumE
Google+: +Jessica Russo 
BlogLovin': Healthy: Yum-E!

Sunday, June 1, 2014

Turkey Bacon - Healthy: Yum-E!


<a href="http://www.bloglovin.com/blog/13655747/?claim=najnbynfnmp">Follow my blog with Bloglovin</a>


Most people are familiar with bacon (ya think?!). And most have heard of this turkey "bacon" stuff, too. Bacon lovers are usually skeptical, and I honestly can't blame them. Bacon is a prized ingredient in many cultures, recipes and especially, for men and sporting event watch parties. In fact, my mouth is watering and the thought of yummy, crispy bacon.

So, TURKEY bacon. Let's talk about turkey bacon compared to the "real" stuff. Some people argue that if you get a high quality center cut kind of real bacon, that the difference is negligible. Perhaps that truth is somewhat true. But, read the nutrition label... the fact is, turkey bacon has less fat. Less fat is good, so I vote TURKEY BACON!

Bacon of any sort can be a mess and a pain to cook, especially in larger portions at a time. Well, messy and a pain no more! Healthy: Yum-E has got a solution!


Oven Roasted Turkey Bacon


1 package turkey bacon
1-2 t. freshly cracked black pepper
your largest sheet pan, or 2 not so large ones

Lay out your bacon evenly on your sheet pan (or sheet pans); make sure they are in one layer with no overlapping bacon. Sprinkle every piece with some freshly cracked black pepper - Yum-E! [I love pepper]. Roast at 400 degrees for about 10 minutes, or until cooked to crisp. I like my bacon with extra crisp, and even slightly burnt edges. Cooks yours according to taste. Don't walk too far away... it could burn more than on the edges rather quickly. Your ears and nose will help you mind your bacon :)

Serve immediately.

I use Jennie-O brand turkey bacon - nutritional info per 2 slices pictured below


Follow us, pretty please!
 IG: @HealthyYumE
Facebook: Healthy: Yum-E
Twitter: HealthyYumE
Google+: +Jessica Russo 
BlogLovin': Healthy: Yum-E!

Italian Lentils with Veggies - Healthy: Yum-E!

Lentils are classic, prehistoric in fact. They are so cheap to prepare, yet so comforting, satisfying, filling and Yum-E! Some might think lentil and think: boring! But, Healthy; Yum-E doesn't! Ours are made with full flavor and lots of tasty, aromatic veggies!

What are lentils, anyways? LEGUMES! They are a super, whole, heart-healthy, fiber-filled, energizing, iron-rich, blood-sugar-stabilizing, cholesterol lowering, mineral, vitamin and protein packed, legume*! *nutritional information taken from The World's Healthiest Foods website — yeah, that's right, they are one of the world's healthiest foods... need I say more?


Check these legumes out... (topped with oven roasted chicken breast for added protein)


Italian Lentils with Veggies

1 1/2 T. olive oil
1 medium onion, diced
1 medium red bell pepper, diced
1/2 cup carrots, diced
1/3 cup celery, plus celery leaves, diced
3 garlic cloves
2-3 t. salt, to taste
1-2 t. black pepper, to taste
1 t. dried oregano (fresh is always best - if so, add 2 t. fresh oregano)
1 t. dried basil (fresh is always best - if so, add 1 T. fresh basil, or 1 stalk - my Nonna left it whole, but you can also cut it into ribbons aka chiffonade) 
1/4 − 1 t. crushed red pepper, to taste (the more, the spicier & we like spicy!)
1 can diced tomatoes
1 cup water
1 package dried lentils
Parmesan cheese, for garnish, optional

Saute all the veggies with the olive oil & seasonings over medium heat until slightly softened in large stock pot. Add diced tomatoes, water and lentils. Bring to a strong simmer over medium-high heat, then turn heat down to medium-low, cover and cook for 25-30 minutes or until lentils are tender but NOT mushy. The best lentils, in my humble opinion, are al dente (which in Italian means "to the tooth", therefore having a slight bite). Check seasonings and add salt/pepper to taste. Serve as a side, or as a base similar to how you would use rice and top with protein of choice. As pictured above, I topped mine with oven roasted chicken breast (seasoned similarly, roasted at 375 for about 15 minutes or until fully cooked but NOT over cooked) and garnished with extra crushed red pepper and parmesan cheese.

Nutritional information to come

Italian Lentils with Veggies - Healthy: YUM-E!


Follow us, pretty please!
 IG: @HealthyYumE
Facebook: Healthy: Yum-E
Twitter: HealthyYumE
Google+: +Jessica Russo 
BlogLovin': Healthy: Yum-E!

Tuesday, March 11, 2014

Tuesday Tips for Healthy: YUM-E! cooking... Leftover FRESH Herbs! YUM-E!

Dried herbs just don't compare to the fresh ones. From basil, to cilantro, to parsley and mint... fresh herbs can really enhance your dish!

When cooking healthy meals, it is so important to keep it flavorful! Healthy food can and SHOULD taste good! There are plenty of flavor options to make it YUM-E and stay Healthy!

Back to fresh herbs... nothing compares, but dang are they hard to keep fresh! What do you do with the half a bunch (and then some) of leftover fresh herbs after you've used what you need for a dish?

Here is the solution in today's Tuesday Tips for Healthy: YUM-E! cooking... :


Leftover FRESH Herbs! YUM-E!

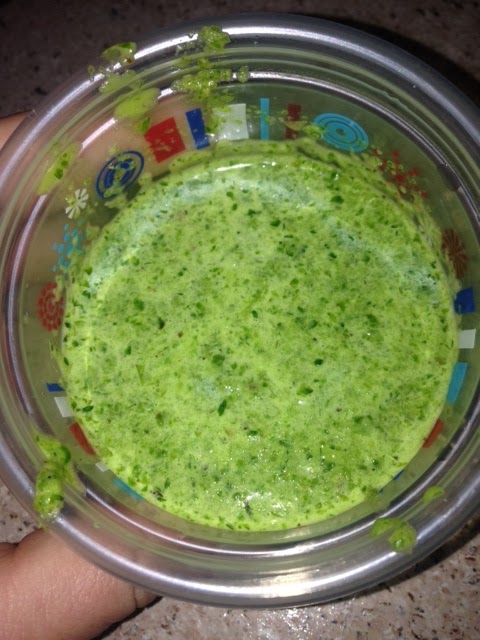
Place remaining fresh herbs in blender, bullet, food processor, or anything of the sort*. Add a pinch of salt and pepper, and a fresh garlic clove, diced roughly (optional) - also optional is some crushed red pepper: YUM-E! (I love the hint of spice!). Add a teaspoon or 2 of olive oil (depending on how much herb you have - I would say 1 t. per 1/4 cup fresh herb) plus 1-2 teaspoons of hot water (again, depends on the amount of fresh herb). 


Blend together for about 30-45 seconds; you are looking for something slightly looser than a pesto. Store "loose pesto" in mini tupperware or plastic sandwich bag in your freezer.


Next time you want some fresh herb flavor, pull out your leftover herb "loose pesto" and mix into your dish! So YUM-E! and such a save for your fresh herbs!

*Don't have a blender of any kind?? Roll the herbs into a tight ball and place on cutting board. Chop, chop, chop, as fine as possible; stir in the ingredients listed above and store in the same fashion.


Leftover FRESH Herbs - What an awesome tip for Healthy: YUM-E! cooking!


Follow us, pretty please!
 IG: @HealthyYumE
Facebook: Healthy: Yum-E
Twitter: HealthyYumE
Google+: +Jessica Russo 
BlogLovin': Healthy: Yum-E!

Friday, March 7, 2014

The easiest Healthy: YUM-E Breakfast sandwich ever!

If you are anything like me, you are always in a rush to get ready for work in the morning! No matter what time I go to sleep, I always hate the sound of my alarm. It never fails, I hit the snooze button at least once (Okay... maybe more like 3 times).

The first two things I think about every morning without fail is Coffee! Breakfast! (in that order, and as emphatic as an exclamation point should be!)

Coffee is easy. (although here is a fun tip: sprinkle some cinnamon in with your coffee grounds for an extra hint of flavor. Yum-E!)

Breakfast... what's for breakfast when you're ready to go, but have less than 5 minutes to get out the door? A processed granola bar? Cold pizza? A reheated, once frozen for months processed breakfast sandwich? A leggo my eggo? Or the worst option, skipping breakfast all together.

I have a solution! But you will need to invest... here I present one of my favorite kitchen gadgets ever! A microwave egg cooker, or whatever your local supermarket calls it. Walmart sells it for $2.97. Can you spare some change for that? Serious R.O.I. right there! Please take note that you can buy this gadget that will cook all the eggs in 60 seconds you could ever want to eat for less than you can buy one egg sandwich at your local Starbucks; just sayin'.


The easiest Healthy: YUM-E breakfast sandwich
...only 4 ingredients, plus some seasonings I bet you already have in your pantry!

1 english muffin
1 extra large egg
1/5 avocado
1 slice tomato (or 2 if you only have a roma (or small) tomato
seasonings of your choice (refer below for my faves!)

It's an egg sandwich; obviously, you need an egg. One extra large will do, but feel free to cook your friend or your sig. other one at the same time! I use Eggland's best, which are about $2.75 for 1 dozen of extra large eggs [1 egg = $.23]. Spray the inside of your micro-egg cooker with Pam or something similar, crack your egg into the cooker, and season with your fave seasonings. I use a tiny dash each of salt, pepper, garlic powder, tarragon and some crushed red pepper.

After your egg is seasoned to taste, close your egg cooker and microwave for 55 seconds for one egg, 1:10 for two eggs. Let sit in microwave while your english muffin toasts. 


I use Thomas' light multi-grain english muffins (only 100 calories and 8 grams of fiber! - about $3.35 for a 6-pack; 1 = $0.56). I toast mine under my oven's broiler because my teeny 1 bedroom apartment hardly has enough counter space for a toaster! Whatever works, right?


Meanwhile, while your english muffin is toasting... pull out your avocado (Heart healthy fats all over the place! About $.99 each; 1/5 = $0.20). 

If you [are weird and] hate avocado, please try it in this sandwich... or, substitute your fave hummus... or, if all else fails, spread a laughing cow cheese wedge instead! In the past, I have sliced my avocado onto my sandwich. What I found would happen while eating on the go is that my avocado would fall out of my sandwich. Today, I tried spreading it and it was AWESOME and worked perfectly! I had avocado in every single bite which was so YUM-E! I season every layer of my food for the MOST flavor; you'll notice some salt and pepper sprinkled on my avocado "spread":


Next comes a slice of tomato (about 1/5 of a large tomato). I found an acid-free, yellow heirloom tomato at my local produce market for about $1.25 (1/5 slice = $0.25). Of course, it is also seasoned (because I am serious when I say I season every layer of my food... healthy food doesn't have to be bland; my mission is to prove that!):


Next, the star of the show, my microwaved-in-55-seconds EGG!


Place the other side of the english muffin on top. And, voilĂ !

The easiest, cheapest, Healthy: YUM-E Breakfast sandwich EVER!

...all for a whopping $1.24 and about 2 1/2 minutes of your time!!


Nutrition Facts, coming soon!


Healthy: YUM-E!


Follow us, pretty please!
 IG: @HealthyYumE
Facebook: Healthy: Yum-E
Twitter: HealthyYumE
Google+: +Jessica Russo 
BlogLovin': Healthy: Yum-E!

Tuesday, March 4, 2014

Tuesday Tips for Healthy: YUM-E! cooking - Roasting Veggies!

Instead of steaming or boiling your veggies, roast them in the oven for better, richer flavor!

First, wash and dry your veggies thoroughly. Then, cut relatively evenly to ensure even cooking.

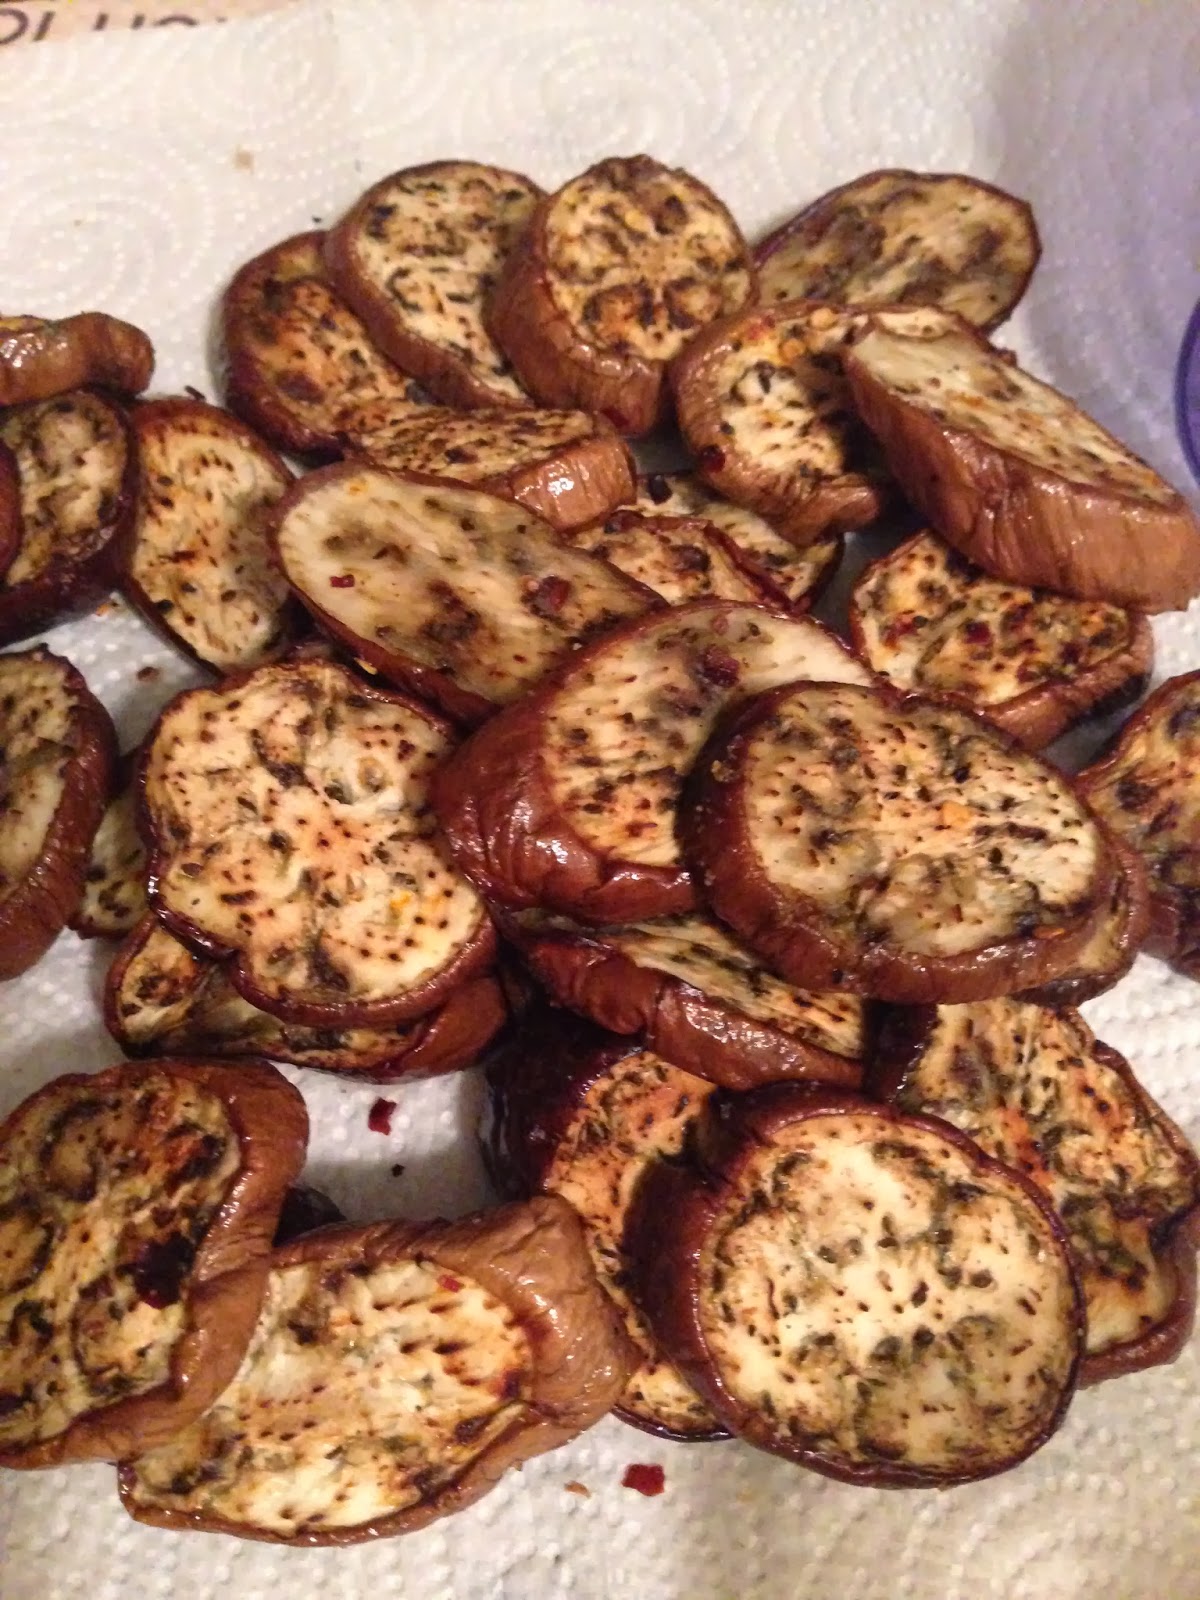
Place your cut veggies in a large bowl. Drizzle very lightly with Olive oil or coconut oil, sprinkle on your favorite seasonings (perhaps some salt, pepper & garlic: YUM-E! - I also add an herb, usually thyme, rosemary or oregano plus some crushed red pepper because I like it HOT!) and toss gently.

Spread your seasoned veggies evenly on a cookie sheet or in a baking dish. Roast at 375-400 until tender. 

*Half way through the cooking process, make sure to flip/move your veggies around so they cook evenly!

The result will be golden, delicious and YUM-E veggies! Add a spritz (or 5) of fresh lemon, and YUM-E!

Tuesday Tips for Healthy: YUM-E! cooking - ROASTING veggies!


Roasted Brussel Sprouts: YUM-E!


Roasted Spaghetti Squash: YUM-E!


 Roasted Japanese Eggplant: YUM-E!


Roasted Sweet Potatoes: YUM-E!


Roasted Zucchini: YUM-E!


Follow us, pretty please!
 IG: @HealthyYumE
Facebook: Healthy: Yum-E
Twitter: HealthyYumE
Google+: +Jessica Russo 
BlogLovin': Healthy: Yum-E!